2.3. Viewing
Once we have constructed the 3D model, we need to define the viewpoint. To use an analogy of a camera, we need to choose:
- Where to put the camera;
- Which way up to hold the camera; and
- Where to point the camera to.
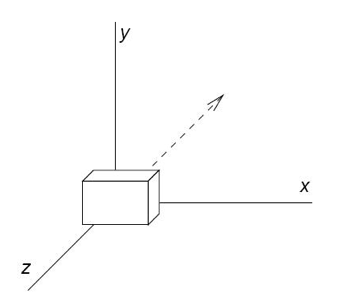
The defaults are:
- Camera at the origin
(0, 0, 0); - Pointing down the Z axis; and
- With the up position being the Y axis.
Something like this:
If we turn the camera upside moving, so it is help with the “up” being down the Y axis, then everything would appear upside down.
2.3.1. Moving the camera
Moving the camera is a bit of a funny one.
We do not move the camera in OpenGL. We move everything else, but the camera “stays in place”.
So if we wanted to move the camera up, we would move everything that we can see down. If we want the camera to zoom in on something, we move that something closer. If we want the camera to move away from something, we move that something away.
2.3.2. Perspective
However, moving something closer to us or away from us doesn’t make it bigger or smaller, at least not in computer world.
What happens is that things that are closer to us will block things that are farther away, if they are in front of each other.
There is a way to make things far away smaller, though, which is simply by shrinking them as they get farther away.
We can do that using a different projection:
- Parallel or Orthographic (things don’t get smaller as they move farther away); or
- Perspective (things get smaller as they move farther away).
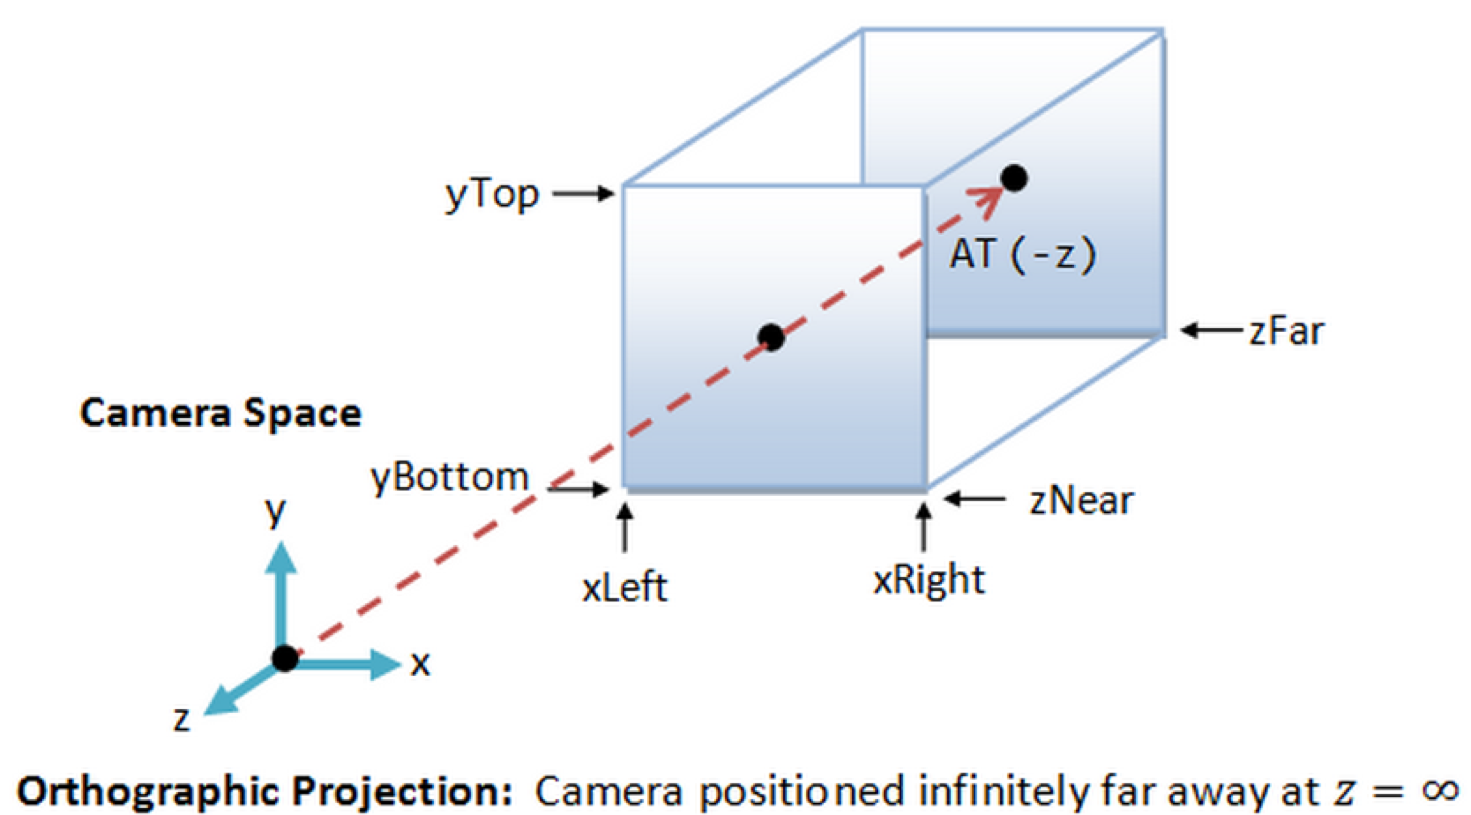
2.3.2.1. Orthographic Projection
In Orthographic Projection, we imagine we are drawing things in a cube. Things outside the cube don’t get drawn (clipping), but things that are closer to the camera or far away from the camera are the same size.
2.3.2.2. Perspective Projection
In Perspective Projection, we imagine we are drawing things on a frustum instead of a cube. Then, we convert the frustum to a cube once we have finished drawing.
What this achieves is that things that are further away from the camera get shrunk, whereas things that are closer to the camera get enlarged. Things that are outside the frustum get clipped.
2.3.3. Clipping
Finally, after the projection has been set and the transformation applied, we can do clipping and remove vertices that are outside the viewing volume.
2.3.4. Viewport
And after, we have to transform the image into an actual screen image, which is drawn in the window.
It is important that the viewport has the same aspect ratio as the viewing volume, so this conversion does not distort the image.
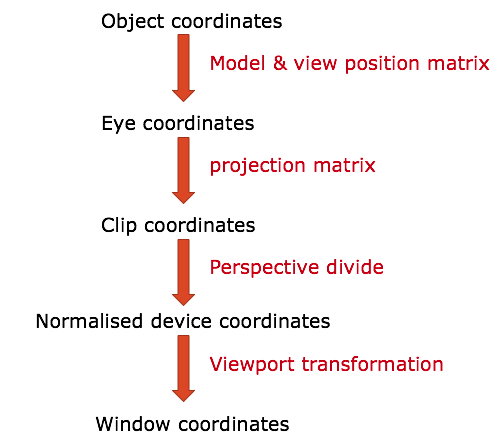
2.3.5. To Summarise
- We define our object coordinates and apply transformations to them;
- We apply the view transformation;
- We apply the perspective transformations;
- We clip the coordinates;
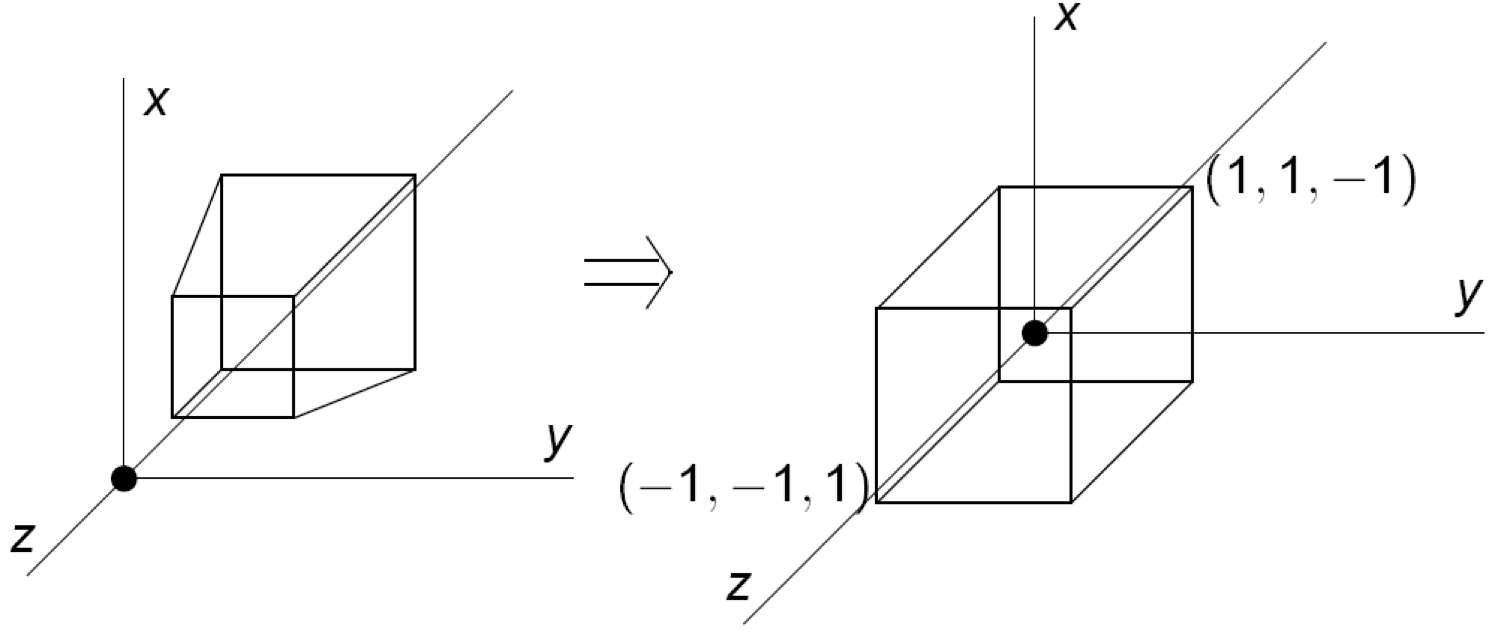
- We apply the perspective divide, which converts coordinates into ordinary 3-d coordinates in the range of
(-1, 1); - We calculate normalised device coordinates which converts frustum into cube and ensures z-buffer culling[1];
- We apply the viewport transformation to convert view into window coordinates.
Footnotes
| [1] | z-buffer culling is the removal of vertices that are behind other vertices, and so cannot be seen. |